Digital Denture in exocad: 7 Steps from Teeth to Printing
A digital denture in exocad is the complete cycle from picking artificial teeth out of a library to modeling the base for 3D printing or milling. The workflow is driven by the DentureCAD module (called exocad Full Denture in the English documentation), which guides the technician through every stage: articulation, tooth setup, base design and preparing files for production.
Below we break down the full exocad full denture workflow — what happens at each step, how to choose a tooth library, and what options you have for the final fabrication of the denture.
What is DentureCAD and how the Full Denture module works
DentureCAD is a dedicated module within the exocad ecosystem for complete and partial removable dentures. It works with scanned impressions or models, links them to a virtual articulator and lets you build the denture from library teeth on a modeled base.
The key difference between the digital protocol and the classic one is that you don't solder or invest in plaster — you assemble the construction in CAD and then send it to 3D printing or milling. The result is either a monoblock try-in or a finished denture with sockets for artificial teeth.
exocad Full Denture workflow: stages in order
The digital denture protocol in exocad breaks down logically into several sequential steps. Each of them can be revisited and redone without losing the previous data.
- Import jaw scans and the bite registration, align to the articulator
- Define the occlusal plane, midline and reference landmarks
- Choose the tooth library and the setup line to match arch size and shape
- Automatic tooth setup with manual occlusion correction
- Model the denture base and the denture borders
- Export STL for 3D printing or milling
During the setup stage exocad offers arrangement presets from the tooth manufacturers, which noticeably speeds up the work compared with manually positioning each element.
How to choose a tooth library for a complete denture
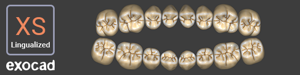
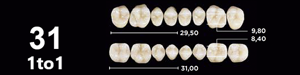
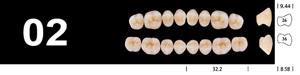
The tooth library defines the morphology, arch form and esthetics of the future denture. The DentalLibs catalog for exocad Full Denture / DentureCAD holds 23 tooth libraries from different brands — from classic tooth sets to digital lines with ready-made setup presets.
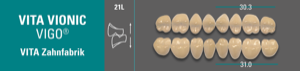
Among the high-frequency options, technicians most often reach for exocad's own line Inspira Denture Tooth Library, as well as the Genios digital sets by Dentsply Sirona and BlueLine by Ivoclar. For esthetic cases VITA VIONIC DIGITAL VIGO is a good fit, and among premium sets there are Candulor PhysioStar NFC+ and bredent neo.lign.
The choice depends on whether you're working with a specific brand's original millable teeth or printing the denture as a monolithic piece. If you plan to bond factory teeth, take the library of the manufacturer whose tooth sets you keep in stock — then the sockets will match the real teeth.
Tooth setup and denture base modeling
After you pick the line, exocad arranges the teeth along the occlusal plane automatically. Then the technician corrects the inclinations, contacts and overlap manually, referring to the articulator and the borders of the edentulous ridge.
Denture base modeling runs on top of the setup: the software forms the body of the denture, and you set the thickness, borders, gingival relief and the zone that contacts the mucosa. For a removable denture it's important to carefully work the borders along the mucobuccal fold and the torus — this affects retention and comfort.
If the denture is fabricated in two materials (a pink base and teeth), exocad forms the sockets for the artificial teeth. For the monolithic version the teeth and base are merged into a single model for single-color printing with subsequent staining, or for multicolor printing.
Printing the denture base: materials and fabrication options
An STL is exported from DentureCAD — either the base separately or the whole denture. For 3D printing the base you use certified denture base photopolymers (pink resins for prolonged contact with the mucosa), and for the teeth, separate tooth resins or factory tooth sets.
In practice three output scenarios are common:
- Printing a try-in as a monolith — a fast way to verify the setup and borders in the mouth
- Printing a pink base with factory teeth seated — the classic hybrid of digital and hand assembly
- Printing or milling the final denture fully digitally
The specific curing, layer and washing parameters depend on the printer + resin pairing, so rely on the material profile validated by the printer manufacturer. Made-up exposure values will only hurt the fit here.
Frequently asked questions about digital dentures in exocad
Can you print a complete denture as one whole piece in exocad?
Yes. DentureCAD exports an STL for monolithic printing of the whole denture, or the base and teeth separately for two-material printing or seating factory tooth sets.
How does DentureCAD differ from DentalCAD?
DentureCAD is the module for removable complete and partial dentures with tooth libraries and an articulator. DentalCAD is designed for crowns, bridges and implant work.
Which tooth library should a beginner choose?
It's easier to start with the built-in Inspira by exocad or the digital lines Genios, BlueLine, VITA VIONIC — they have ready-made setup presets that speed up assembly.
How many tooth libraries are available for exocad Full Denture?
The DentalLibs catalog for exocad Full Denture / DentureCAD holds 23 tooth libraries from different brands, including high-frequency brands and regional lines.